
Thermostat Installation in Maplewood, MO
Thermostat installation in Maplewood, MO is covered here, detailing how proper wiring, compatibility checks, and smart-home integration enhance comfort and energy efficiency. It addresses common Maplewood challenges such as C-wire issues, compatibility with heat pumps, and placement considerations. The guide explains choosing between programmable and smart thermostats, essential step-by-step installation, post-install testing and calibration, plus warranty insights and maintenance tips to ensure reliable performance across fluctuating seasons. This overview emphasizes safety, accuracy, and long-term savings through professional care.
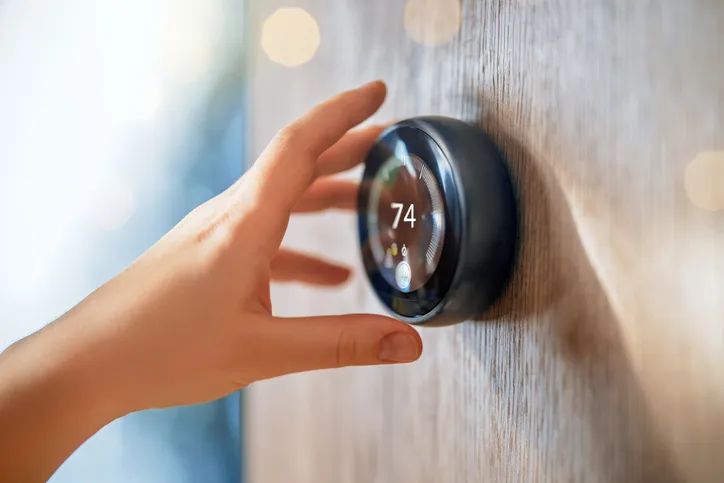
Thermostat Installation in Maplewood, MO
Upgrading or replacing a thermostat is one of the highest-impact improvements you can make to comfort and energy efficiency in Maplewood, MO homes. Professional thermostat installation in Maplewood, MO ensures the new control communicates correctly with your furnace, air conditioner, heat pump or multi-stage system, avoids wiring mistakes (including C‑wire issues), and integrates cleanly with smart-home platforms so you get reliable performance year round.
Why professional installation matters in Maplewood
Maplewood experiences humid summers and cold winters that place different demands on HVAC equipment. Many homes here have older furnaces or split systems and sometimes limited or aging thermostat wiring. A professional installer will evaluate compatibility with local climate needs (humidity control, heat pump defrost cycles, two-stage heating) and prevent common mistakes that lead to short cycling, inaccurate temperature control, or loss of smart features.
Common thermostat problems in Maplewood homes
- No C‑wire or inadequate power for smart thermostats (resulting in reboots or dead batteries)
- Incompatible controls for heat pumps, two-stage compressors, or dual-fuel systems
- Poor thermostat placement (sunlit walls, near drafts, or behind doors) causing inaccurate readings
- Incorrect wiring after DIY swaps leading to nonresponsive heat/cool or blower-only operation
- Lack of integration with smart-home systems like Apple HomeKit, Google Home, or Amazon Alexa
System compatibility assessment & wiring check
A professional thermostat installation begins with a thorough compatibility assessment:
- Inspect the existing thermostat wiring at both the thermostat and at the furnace/air handler to confirm wire labels (R/RC/RH, C, Y, G, W, O/B, etc.).
- Verify whether a true common (C) wire is present; if not, evaluate options: run a new C wire, use a C-wire adapter/power extender, or choose a low-power thermostat that supports power stealing.
- Confirm the HVAC type (single-stage, multi-stage, heat pump, or dual fuel) and note any zoning controls or aftermarket equipment that affect control logic.
- Check transformer voltage and confirm safe shutdown procedures; professional installers use proper tools and turn off the system’s power before touching low-voltage wiring.
Choosing the right thermostat for Maplewood homes
When selecting between programmable and smart thermostats, consider these factors for Maplewood living:
- Humidity sensing and control for hot, humid summers
- Heat pump compatibility and support for O/B reversing valves and emergency heat selection
- Two-stage or variable capacity support if your system has staged heating/cooling
- Smart-home platform compatibility (HomeKit, Google Assistant, Alexa) depending on your ecosystem
- Remote sensors or multi-room sensor support if temperature imbalance or drafts are common in your home
Programmable thermostats offer schedule-based savings; smart thermostats add features like geofencing, learning schedules, remote diagnostics, and energy reporting that can be especially useful when managing seasonal swings in Maplewood.
Professional installation — step-by-step overview
- Pre-install inspection and compatibility check (wiring, HVAC type, placement)
- Power down the HVAC control circuit at the furnace/air handler for safety
- Remove the old thermostat, label each wire, and document terminal connections
- Mount and secure the new thermostat base with attention to placement and leveling
- Connect wires to the correct terminals, install C-wire solution if required, and insulate unused conductors
- Restore power and configure the thermostat for your HVAC type (single-stage, multi-stage, heat pump, etc.)
- Connect to Wi‑Fi and link to chosen smart-home platform if applicable; reconcile any platform-specific requirements (for example, HomeKit-certified devices and hubs)
- Run through manual and automatic test cycles for heat, cool, fan, staging, and emergency heat modes
Throughout the process, professionals follow safe wiring practices and label connections so future service is straightforward.
Configuration, integration, and smart-home setup
Integration with smart-home systems includes:
- Setting up cloud accounts and verifying device registration for Alexa or Google Assistant
- For Apple HomeKit, using HomeKit-certified thermostats and ensuring required hubs are present
- Creating schedules, scenes, and automations (for example, linking occupancy sensors or geofencing to reduce runtime when you’re away)
- Linking remote sensors for more accurate zone control and addressing rooms that run warmer or cooler than the main thermostat location
A proper installer will also configure HVAC-specific settings like staging thresholds, minimum run times, setback ranges, and heat pump defrost parameters.
Post-installation testing and calibration
After installation, thorough testing and calibration are crucial:
- Run full heat and cool cycles and confirm compressor engagement, reversing valve on heat pumps, and proper blower operation
- Verify multi-stage behavior or dual-fuel switching operates as expected under load conditions
- Check temperature accuracy against a calibrated thermometer and apply a temperature offset if needed based on placement
- Confirm remote access, notifications, and smart controls function reliably over Wi‑Fi
- Demonstrate basic use and show where to find manufacturer documentation and warranty details
Testing identifies issues early—especially important in Maplewood where rapid weather changes can reveal setup problems.
Warranty and support
Understand the two layers of protection:
- Manufacturer warranty: Typically covers defects in the thermostat hardware and ranges by brand; review the manufacturer’s terms for durations and coverage.
- Installer workmanship warranty: Professional installers often provide a workmanship warranty covering installation errors or related system damage for a defined period. Keep documentation for both warranties and request written coverage details before installation.
Typical package options (no pricing)
- Basic thermostat installation: Replacement with a programmable or basic smart thermostat and wiring check.
- Smart-integration package: New smart thermostat, Wi‑Fi setup, platform integration (Alexa/Google), and user training.
- Advanced HVAC integration: Full configuration for heat pumps, two-stage systems, dual fuel setups, and multi-sensor installations.
- Residential balancing & optimization: Add remote sensors and tune schedules to address hot/cold spots and seasonal efficiency.
Maintenance tips and Maplewood-specific recommendations
- Check thermostat batteries (if used) annually and replace as needed before winter.
- Keep the thermostat away from direct sunlight, windows, and vents to avoid false readings.
- Schedule a system check before peak cooling and heating seasons so your controls and equipment operate efficiently during Maplewood’s humid summers and cold winters.
- Consider adding humidity control or dehumidification strategies if indoor humidity spikes in summer.
Professional thermostat installation in Maplewood, MO ensures the right device is selected, wired, and configured for your home’s HVAC system and local climate, delivering accurate control, dependable integration, and improved comfort and efficiency.
hear what our satisfied clients have to say

Dakota and his partner called ahead of their arrival, showed up in a timely manner, were courteous and respectful of our home. This is the first time we have used our warranty and all went very smoothly. . They left usno
Unique is quick to respond, efficient, and trustworthy. We have a great relationship with our HVAC service provider! Thanks for the good work!
I recently had the pleasure of hiring Unique Heating and Cooling to install a Bosch tankless water heater in my home, and I couldn't be happier with the experience. From the moment I contacted them, their customer service was exceptional. The team was fast, friendly, and very knowledgeable about the products they offer. They took the time to explain the benefits of the Bosch tankless water heater and answered all my questions thoroughly.
Our tech, Mitch was very professional! Arrived when he said he would, explained exactly what he was doing and made sure we had no questions before he left! Highly recommend Unique!
Milo came and diagnosed the problem with the cooling. He was able to fix it and make some recommendations. Very friendly and professional.
The best heating and air company! From the phone call through the visit, they are courteous and professional. On the day of the service, they call when they are on their way with the expected arrival time. Tech covers his shoes before walking in your door. They are friendly and very professional. Best decision we made when looking to have a new heating and cooling system put in several years ago. Highly recommend this company for all heating and cooling needs
I had a great experience with this company. While doing a routine maintenance of our mini split, the technician found an issue causing a refrigerant to leak. Dakota was prompt, personable, and professional. He told me upfront my expected cost and how long it would take to fix. I highly recommend their services and plan to use them again.
Well they tried but not hard enough. I had three different technicians and all three just told me that is how it is everything looks good. But it was not good. I finally had to call the best in St. Louis and they were here for 2 hours and now I’m very happy. They used a hose to spray the unit outside and my air is running just as it should be. My unit is only 4 years old. Sometimes it pays to go with the best!
Over the last couple years, I've worked with both Dakota and Gary at Unique. They are both professional, punctual, and personable. The company itself is very accommodating and easy to work with, always out the same day if you need them. They're great with call aheads so you you don't have to sit and wait, wondering when someone will arrive. Highly recommended!
Unique Heating and Cooling did repairs to our furnace after our home was struck by lightning. They were responsive and friendly and were able to do the repair for us quickly! We liked them so much, we used them again to have a whole home humidifier installed and we love it! We will continue to use Unique Heating and Cooling and have recommenced them to all of our friends and family! Thanks Unique!!
Service areas
.avif)