
Thermostat Installation in St. Charles, MO
Thermostat installation in St. Charles, MO covers how professional service improves comfort and energy efficiency through careful assessment, precise wiring, and smart device integration. It explains pre-install checks, wiring verification, and optimal placement to prevent temperature swings, followed by a step-by-step installation and calibration process. The guide also outlines smart-home setup tips, energy-saving scheduling, and common post-install troubleshooting, ensuring reliable operation. It emphasizes alignment with local climate needs, older wiring quirks, and ongoing support for long-term performance.
Thermostat Installation in St. Charles, MO
Upgrading or replacing your thermostat is one of the most effective ways to improve comfort and reduce energy use in St. Charles, MO homes. Whether you’re switching from an old mechanical dial to a programmable model or installing a Wi-Fi smart thermostat (Nest, Ecobee, Honeywell and similar), a professional thermostat installation ensures compatibility with your HVAC system, correct wiring, optimal placement, and reliable smart home integration. This page explains what to expect from a thorough thermostat installation in St. Charles, common local issues, the installation process, and post-install support so you can make an informed decision.
Why professional thermostat installation matters in St. Charles, MO
St. Charles experiences hot, humid summers and cold winters, placing diverse demands on heating and cooling systems. Many area homes are older and may have legacy wiring, missing common (C) wires, or multi-stage heating and cooling setups. A proper pre-installation assessment protects against:
- Incorrect wiring that can damage modern smart thermostats
- Poor placement that causes temperature swings or short-cycling
- Compatibility issues with heat pumps, multi-stage systems, or dual-fuel setupsA professional install reduces guesswork and delivers reliable performance, especially when seasonal extremes hit.
Common thermostat issues in St. Charles homes
- Missing C-wire or weak control power preventing smart thermostat operation
- Incompatible wiring for heat pumps, two-stage compressors, or humidifiers
- Thermostat placed near sunlight, doors, or vents causing inaccurate readings
- Short cycling or frequent blower runs after improper replacement
- Wi-Fi connectivity problems in homes with older routers or interference
Types of thermostats and which make sense locally
- Programmable thermostats: Good for homeowners who want schedule-based savings without full smart features. Best for consistent routines.
- Smart thermostats (Nest, Ecobee, Honeywell Wi-Fi models): Ideal for renters or owners who want remote control, learning schedules, usage reports, and integration with voice assistants or home automation.
- Line-voltage and specialty controls: Needed for older electric baseboard heating—these require specific thermostats and wiring knowledge.Choosing the right model depends on your HVAC type (furnace, heat pump, central AC), wiring, lifestyle, and local energy use patterns.
Pre-installation assessment and compatibility checks
A careful assessment prevents common installation problems:
- Identify HVAC system type: gas furnace, electric furnace, heat pump, multi-stage systems, or zone control
- Inspect existing thermostat wiring: check for labeled wires (R, Rc, W, Y, G, O/B, C) and assess voltage
- Confirm presence of a C-wire or evaluate alternatives (add-a-wire kit, power extender kit, or professional C-wire installation)
- Verify compatibility with supplemental equipment such as humidifiers, dehumidifiers, or zone dampers
- Evaluate Wi-Fi strength and home network needs for smart thermostat operation
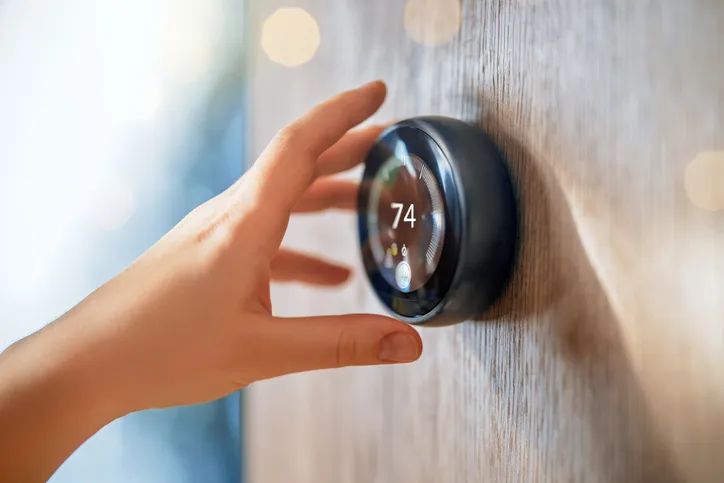
Thermostat placement best practices
Correct placement improves accuracy and system efficiency:
- Mount on an interior wall about 48 to 60 inches above the floor
- Avoid direct sunlight, exterior doors, windows, kitchens, and areas near large appliances
- Choose a central location in the primary living area for representative temperature readings
- Keep at least a few feet from vents and return-air grillesProper placement reduces overwork and improves comfort control.
Step-by-step installation and calibration process
- Safety and power: Turn off HVAC power at the breaker and the system switch to prevent short circuits.
- Remove old thermostat: Note and label each wire connection, take a photo if needed.
- Check wiring and voltage: Verify wire functions and measure control voltage to confirm compatibility.
- Mounting and physical install: Install the new thermostat base level on the wall, run wires through the base, and secure with provided screws.
- Wire connections: Attach wires to labeled terminals (R/Rc, W, Y, G, O/B, C). Use the manufacturer’s label guide for multi-stage systems.
- Power restoration and initial setup: Restore power and follow on-screen prompts to configure system type (furnace vs heat pump), stages, and optional accessories.
- Wi-Fi and smart setup: Connect thermostat to home Wi-Fi, create/associate accounts, and enable voice or home automation integrations if desired.
- Calibration and testing: Run heating and cooling cycles to confirm correct staging, verify fan control, and ensure proper cycling and temperature accuracy. Adjust differential or deadband settings if needed.
- Final verification: Confirm remote control access, schedule creation, and that supplemental equipment (humidifier/dehumidifier) responds correctly.
Smart home integration and Wi-Fi setup tips
- Ensure a stable 2.4 GHz or compatible 5 GHz network signal at the thermostat location; consider a Wi-Fi extender if signal is weak.
- Use strong, unique Wi-Fi passwords and keep router firmware updated for reliable connections.
- Pair thermostats with voice assistants or home automation hubs using manufacturer apps and account credentials.
- Configure energy-saving features in the app and link to local weather when available for adaptive scheduling.
Energy-saving scheduling and usage advice for St. Charles climates
- Summer setpoint: Set higher when away (78 F or higher recommended) and use smart schedules to pre-cool before you return during peak heat.
- Winter setpoint: Lower when away and set programmable setbacks during sleep to reduce heating costs without sacrificing comfort.
- Use setback periods with short recovery times to avoid overwork during extreme temperatures.
- Leverage geofencing or occupancy sensors for automatic adjustments when families leave or return.
- Combine thermostat schedules with regular HVAC maintenance: clean filters, check refrigerant levels, and ensure ducts are sealed for best efficiency.
Warranty and post-installation support
- Manufacturer warranties typically cover thermostat defects; terms vary by brand and model, so review the included warranty documents.
- Installation workmanship best practices: confirm the thermostat has been configured to match HVAC system requirements and test cycles thoroughly.
- Post-install troubleshooting commonly addresses Wi-Fi drops, app connection failures, blank screens, or incorrect temperature readings. Typical fixes include resetting the thermostat, verifying C-wire power, updating firmware, or reconfiguring system type.
Common post-installation troubleshooting
- Blank display: Check breaker, system power, and presence of a C-wire or alternative power solution.
- Wi-Fi disconnects: Reboot router, ensure correct network selection and password, or move router/thermostat to improve signal.
- Short cycling or frequent switching: Verify correct thermostat type for your system and check temperature differential settings.
- Inaccurate temps: Reassess thermostat placement and run calibration cycles; consider relocating if heat sources or drafts affect reading.
If persistent problems arise, documentation from the thermostat and HVAC system will help diagnose compatibility or wiring issues.
A professional thermostat installation in St. Charles, MO addresses local climate demands, older home wiring quirks, and the integration needs of modern smart controls. Proper assessment, careful wiring, thoughtful placement, and calibrated setup deliver better comfort, fewer system conflicts, and measurable energy savings over time.
hear what our satisfied clients have to say

Dakota and his partner called ahead of their arrival, showed up in a timely manner, were courteous and respectful of our home. This is the first time we have used our warranty and all went very smoothly. . They left usno
Unique is quick to respond, efficient, and trustworthy. We have a great relationship with our HVAC service provider! Thanks for the good work!
I recently had the pleasure of hiring Unique Heating and Cooling to install a Bosch tankless water heater in my home, and I couldn't be happier with the experience. From the moment I contacted them, their customer service was exceptional. The team was fast, friendly, and very knowledgeable about the products they offer. They took the time to explain the benefits of the Bosch tankless water heater and answered all my questions thoroughly.
Our tech, Mitch was very professional! Arrived when he said he would, explained exactly what he was doing and made sure we had no questions before he left! Highly recommend Unique!
Milo came and diagnosed the problem with the cooling. He was able to fix it and make some recommendations. Very friendly and professional.
The best heating and air company! From the phone call through the visit, they are courteous and professional. On the day of the service, they call when they are on their way with the expected arrival time. Tech covers his shoes before walking in your door. They are friendly and very professional. Best decision we made when looking to have a new heating and cooling system put in several years ago. Highly recommend this company for all heating and cooling needs
I had a great experience with this company. While doing a routine maintenance of our mini split, the technician found an issue causing a refrigerant to leak. Dakota was prompt, personable, and professional. He told me upfront my expected cost and how long it would take to fix. I highly recommend their services and plan to use them again.
Well they tried but not hard enough. I had three different technicians and all three just told me that is how it is everything looks good. But it was not good. I finally had to call the best in St. Louis and they were here for 2 hours and now I’m very happy. They used a hose to spray the unit outside and my air is running just as it should be. My unit is only 4 years old. Sometimes it pays to go with the best!
Over the last couple years, I've worked with both Dakota and Gary at Unique. They are both professional, punctual, and personable. The company itself is very accommodating and easy to work with, always out the same day if you need them. They're great with call aheads so you you don't have to sit and wait, wondering when someone will arrive. Highly recommended!
Unique Heating and Cooling did repairs to our furnace after our home was struck by lightning. They were responsive and friendly and were able to do the repair for us quickly! We liked them so much, we used them again to have a whole home humidifier installed and we love it! We will continue to use Unique Heating and Cooling and have recommenced them to all of our friends and family! Thanks Unique!!
Service areas
.avif)